Blue Sky DIY

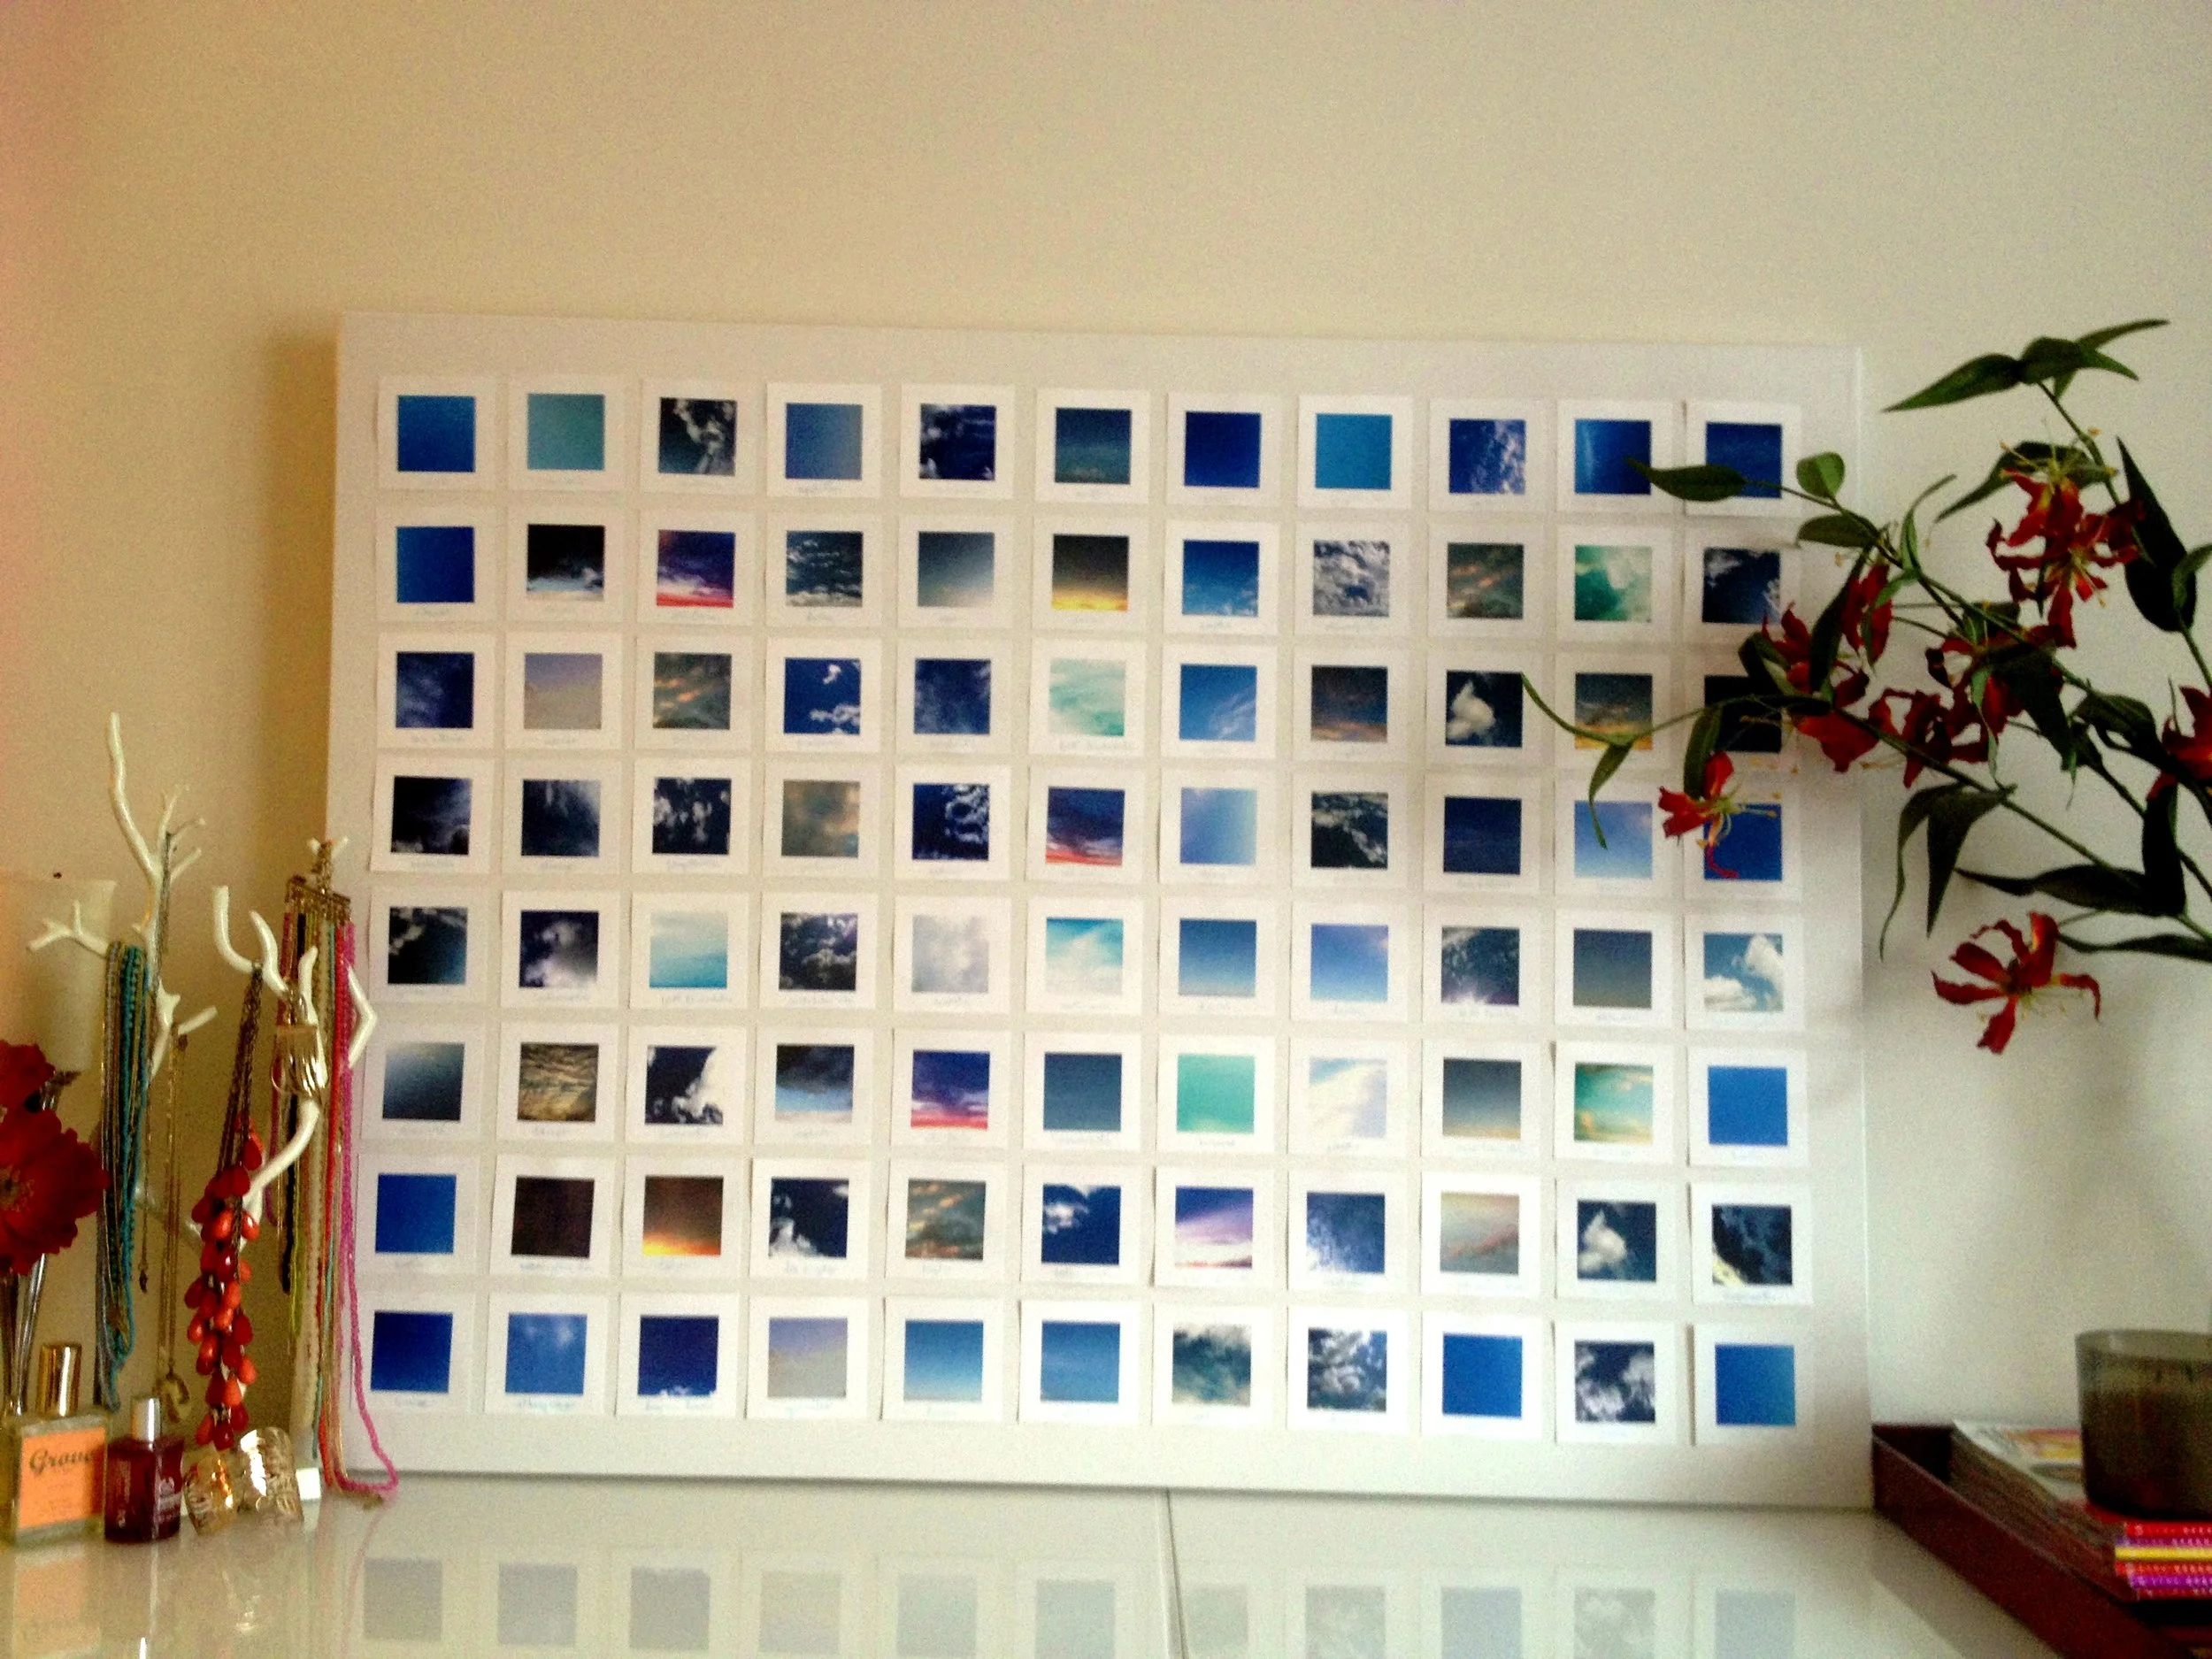
What I started with
For those of you who don’t know Madison, WI, it is one terrific little Midwestern city: full of unique local shops and restaurants. While on tour with Les Mis, I saw a piece of artwork in one of those shops that caught my eye–square pictures of blue sky, labelled with a city name underneath, arranged almost like the periodic table of the elements on a white canvas. It was simple, clean, sophisticated, and whimsical all at once, and as you can tell by the design of this site, I sort of have a thing for sky pictures. I thought about buying it and didn’t, and immediately regretted it when we got to the next city — that is until my DIY instincts kicked in. I decided to take a picture of the sky in every city we visited on tour and make my own blue sky project.

What I got from the photo printers
The part that took some thought was getting those perfect squares I wanted in beautiful printout form. I didn’t want to take the time to individually cut out all those photos, and I didn’t want lame computer prints. After a little online investigation, I came upon “Persnickety Prints“, a excellent little online shop that does Instragram prints in all sizes (in addition to a ton of other cool photo printing stuff–really, they are awesome). Instagram=square. Perfect. I uploaded my previous square cropped photos onto their website and in a blink had beautiful 2×2 photos with a 1/2-inch white border around them. I used a pale blue pen to write the city underneath each photo.
I just needed to decide how big I was going to make this thing. I knew wanted something pretty large scale and dramatic, so I bought a 40″x30″ canvas at an art supply store and painted it bright white with some inexpensive acrylic paint.
Putting it together just required a little trial and error, measurement, and math. When I laid out the rows, I found the I liked the look of 11 across and 8 high. I picked out 88 of my favorite pictures (I took a LOT of blue sky pictures), and did a little math to figure out how much space between each photos.
Wide Dimensions:
11 pictures x 3 inches wide = 33 inches worth of pictures, and I wanted a 1.5″ border all around.
40″ – 33″ = 7″
7″ – 3″ (that’s 1.5 inches on both sides of the row of pictures) = 4″
4″ of white space divided 10 spaces between the 11 pictures gave me a nice, fairly even .4 inches between each picture.
Tall Dimensions:
8″ pictures x 3″ tall = 24 inches
30″ – 24″ inches of pics – 3 inches of border = 3″ of white space
3″ of white spaces divided by 7 spaces between the 8 rows gave me a LESS even, but close enough .428 inches between each picture.
If the math/measurement makes you cross-eyed, you can just eye the layout until you like it. I used my measurements as a guideline for some pencil marks, but I didn’t freak out over it. When I liked the arrangement of pics and the layout, I glued down each photo with mod podge.
What a lovely thing to wake up to each morning: no matter what the sky looks like outside, I’ve got a variety of blue sky inside.
This type of project would work beautifully with all kinds of photos–themed or not. I’m thinking about a second project for some of my other iphone photography. You could do a whole series of smaller canvases for a wall or paint the background canvas a color - there are a ton of options!